Page 2 of 4
Re: Labrador B-17G 44-83790 restoration
Posted: Mon Nov 26, 2012 2:52 pm
by DryMartini
Actually, I would say BLKs 4 & 5 are the most complicated,
due to size, number of parts, and construction. They tie
the wing spars into the fuselage.
Re: Labrador B-17G 44-83790 restoration
Posted: Tue Nov 27, 2012 7:41 pm
by Chuck Giese
While bulkheads 4 & 5 are critical, bulkhead 3 and the flight deck are difficult to construct. We pretty much got the assembly sequence right, and we still went through a lot of metal making custom bucking bars, along with using just about every offset rivet set in Tom's collection. Lots of small parts, and it's a real PITA to assemble.
Re: Labrador B-17G 44-83790 restoration
Posted: Fri Nov 30, 2012 7:31 pm
by Chuck Giese
If this was a movie, the old guy on the restoration team would take a deep draw on his pipe, and the exhaled smoke would start the flashback to the early days.
Instead, I'll just throw a few pictures at ya.....
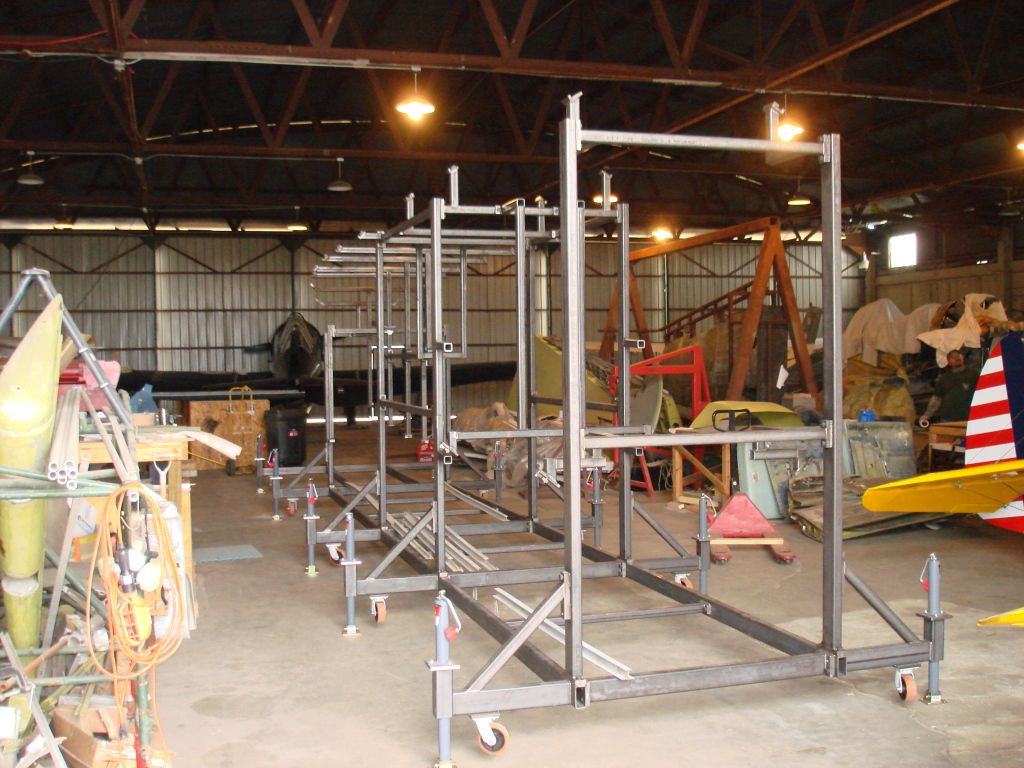
The build started in earnest when we received the forward fuselage jig.
(See Jig construction thread
http://aerovintage.com/forum/viewtopic.php?f=1&t=545 )
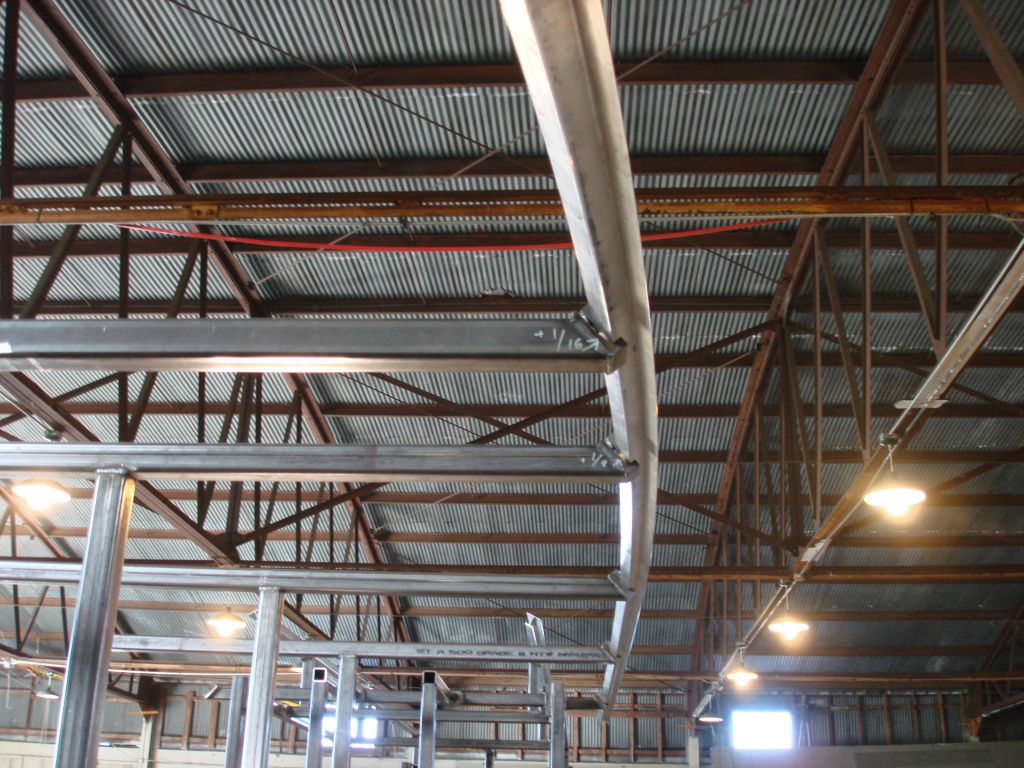
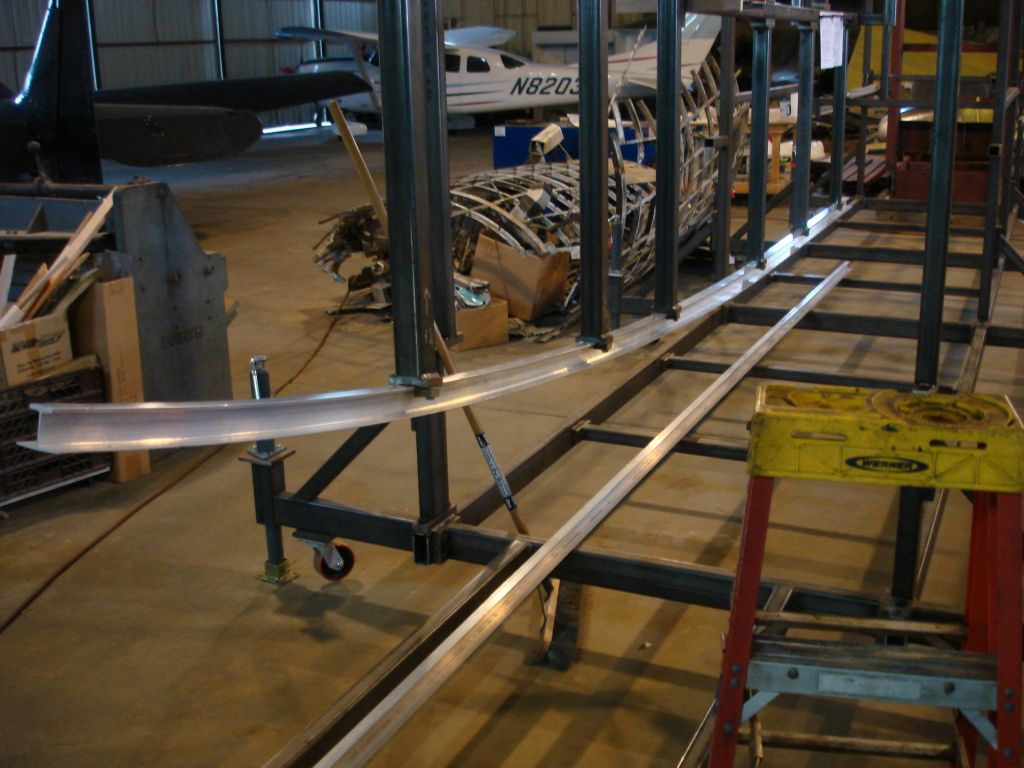
The first step was to bend the longerons. Simple wood dies in a 10 ton press.
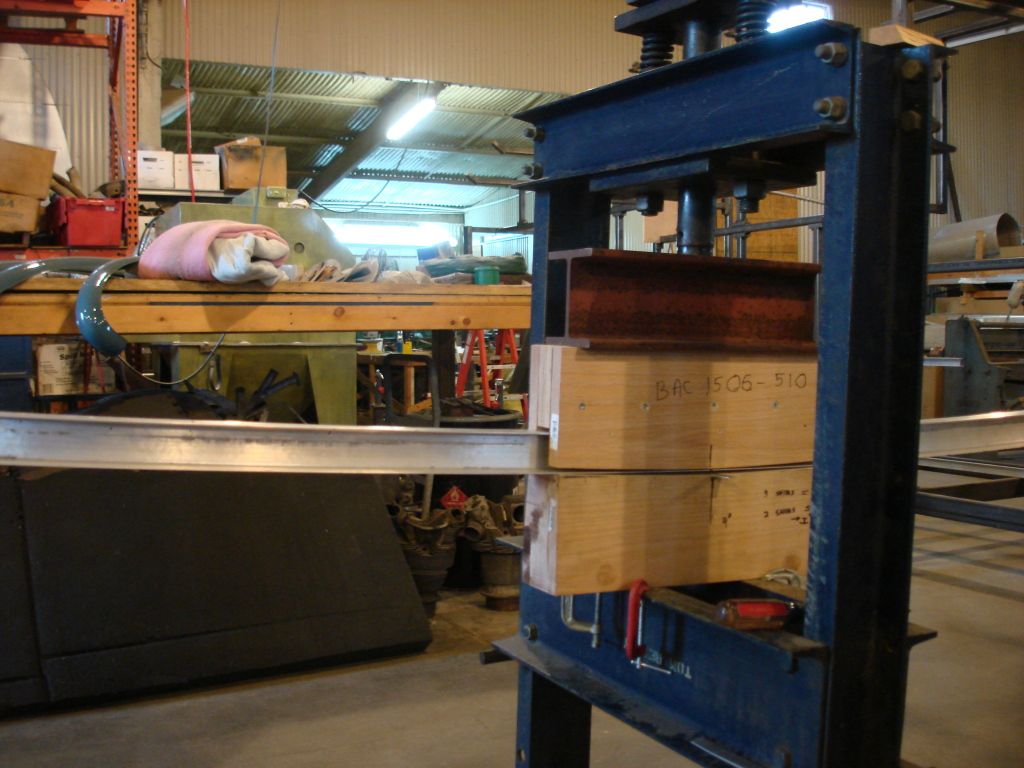
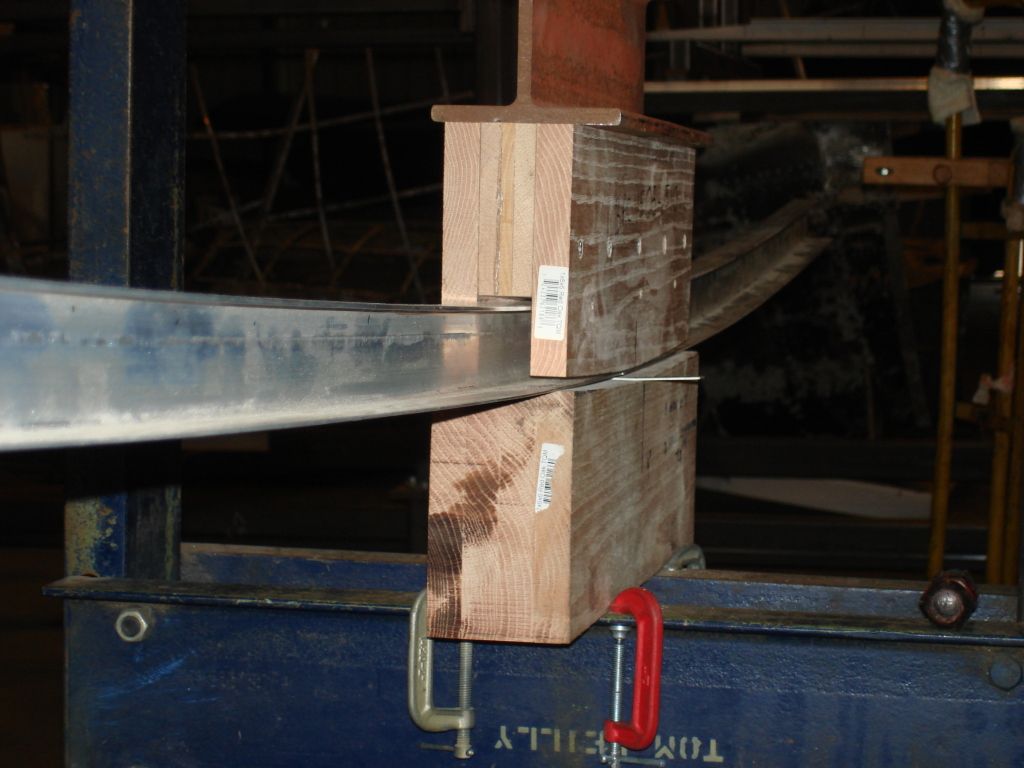
The curve was lofted on plywood to give us a target to bend to.
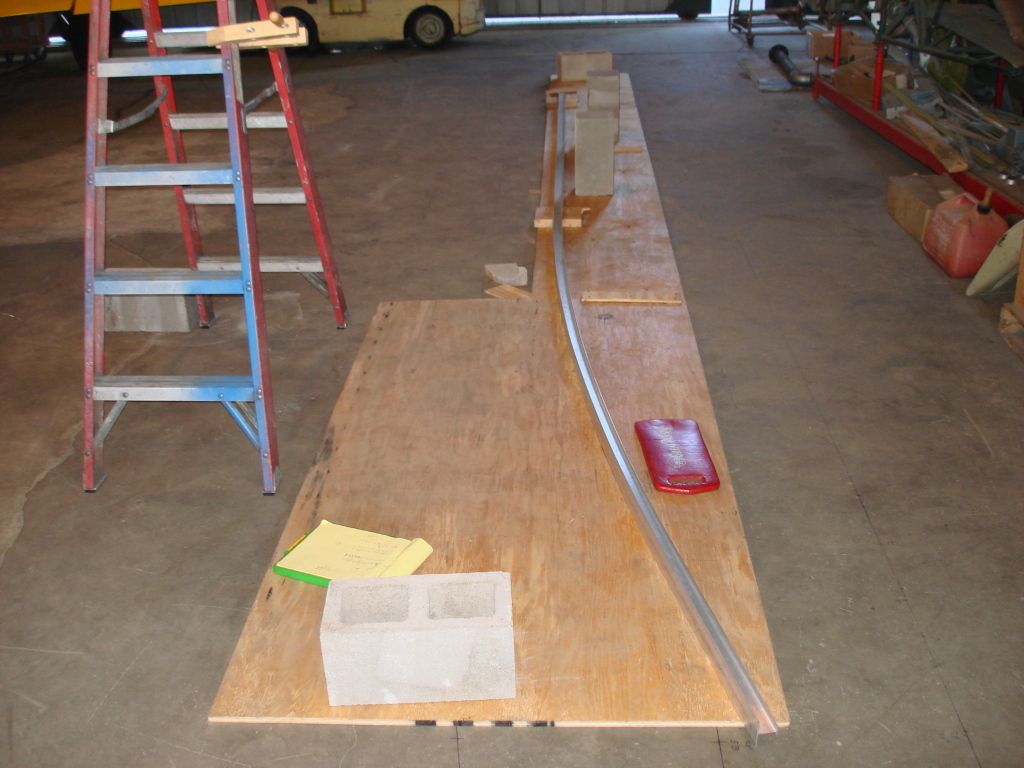
Resulting in 2 top and one keel (bottom) longeron.
Chuck
Re: Labrador B-17G 44-83790 restoration
Posted: Fri Nov 30, 2012 7:51 pm
by Chuck Giese
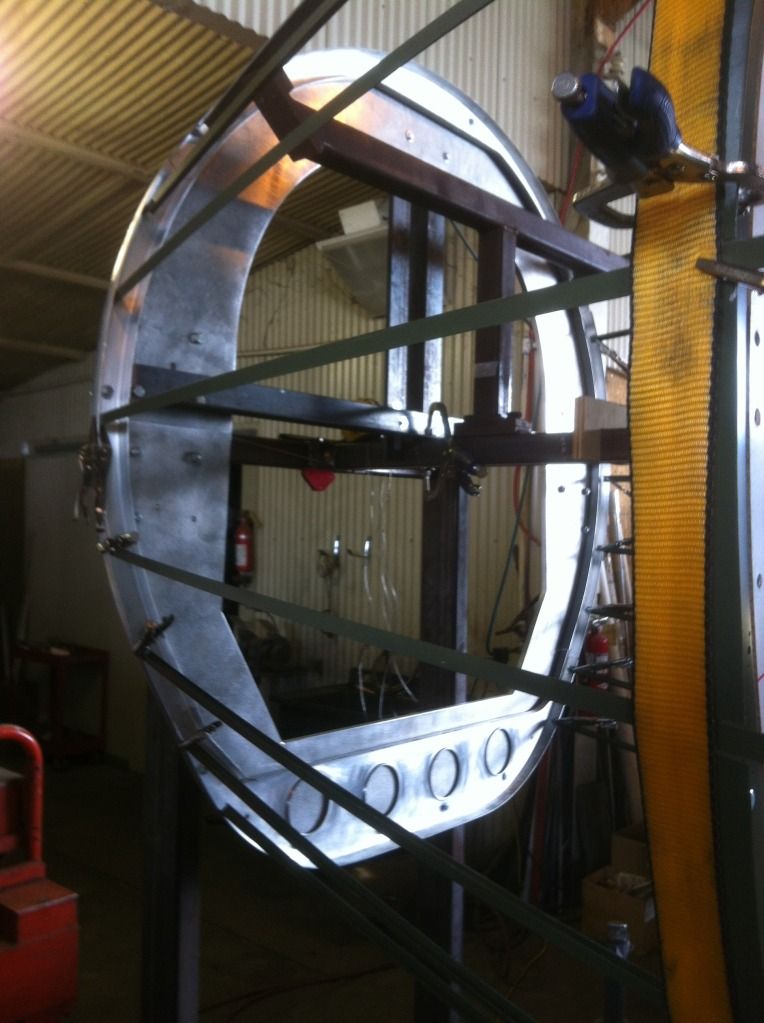
We decided to start with the rebuild of Bulkhead 3 while waiting for the new carry through spars for bulkheads 4 & 5.
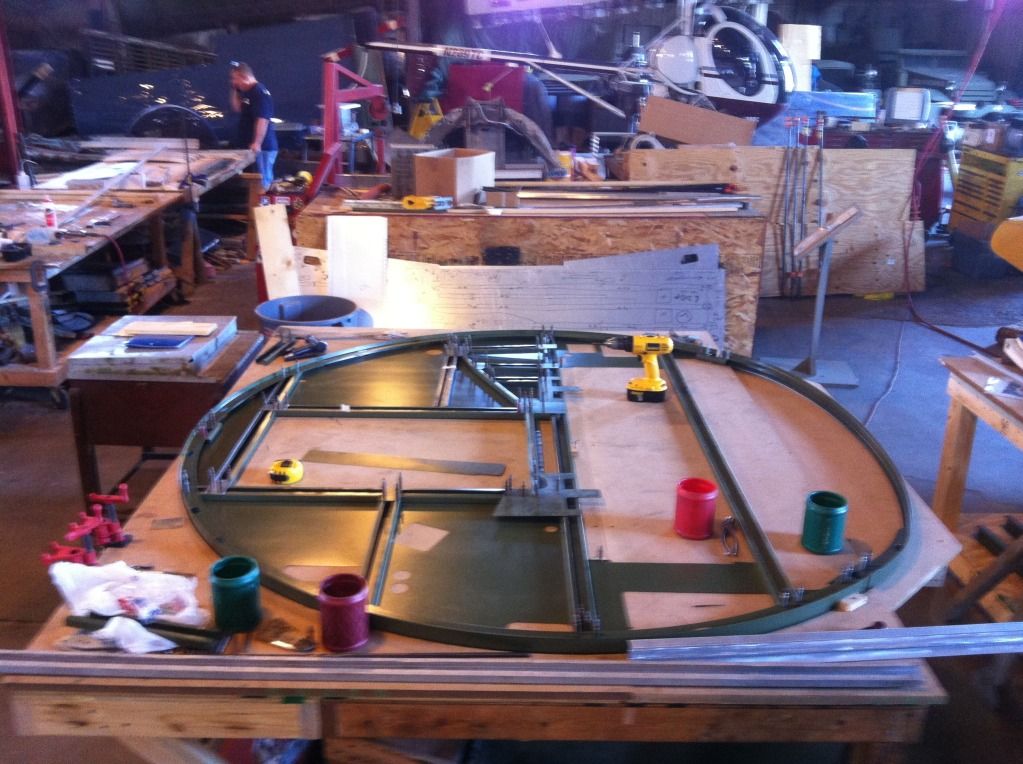
While that was going on, we also used the existing Labrador B-17 heavy structures to make sure the jig alignment was ok, and to lock down the location of bulkhead 3.
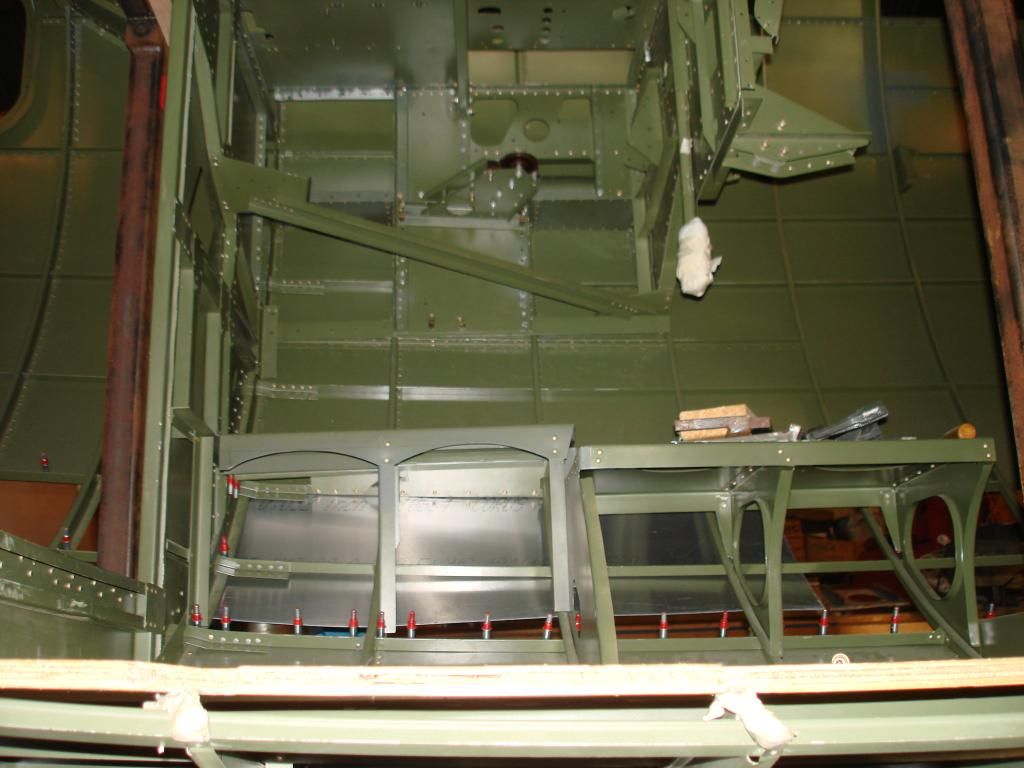
Trial fit of the rebuilt Bulkhead 3 in the jig.
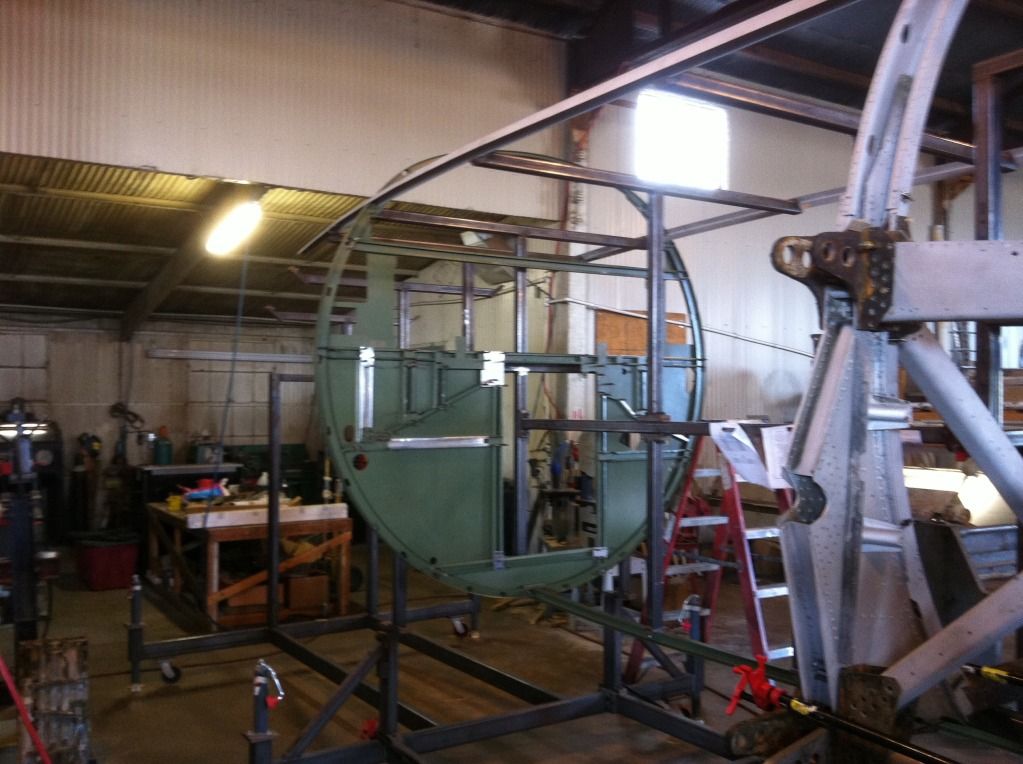
Checking the fit of the flight deck.
Fade to black ......
Chuck
Re: Labrador B-17G 44-83790 restoration
Posted: Sun Dec 02, 2012 5:49 am
by Chuck Giese
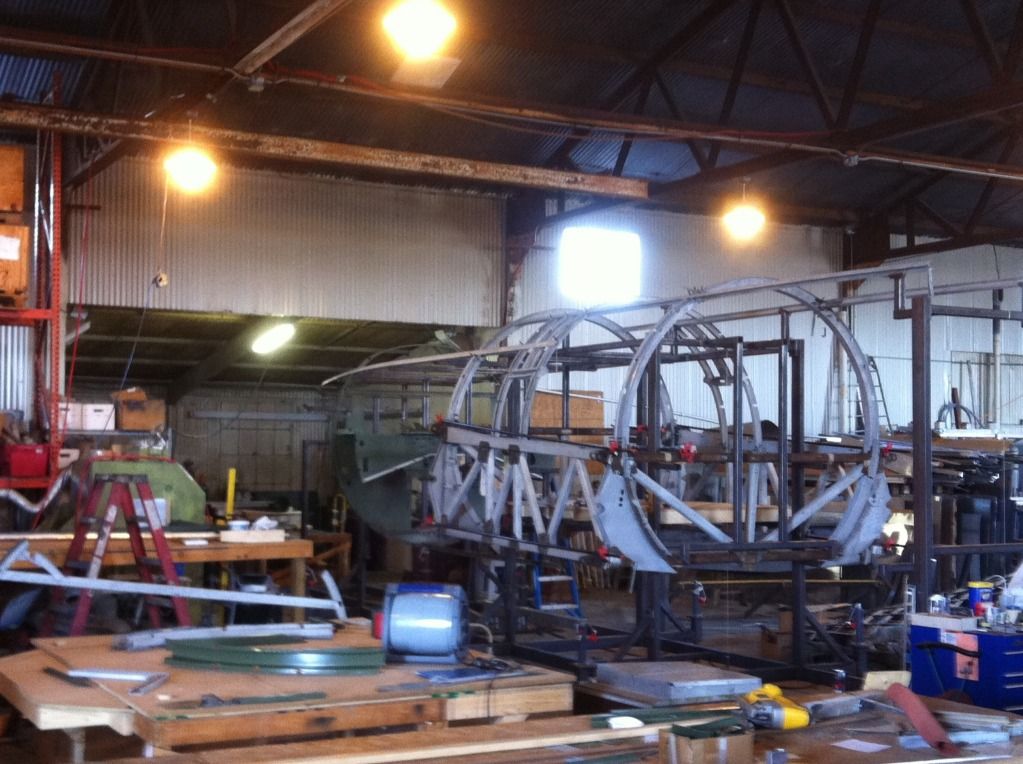
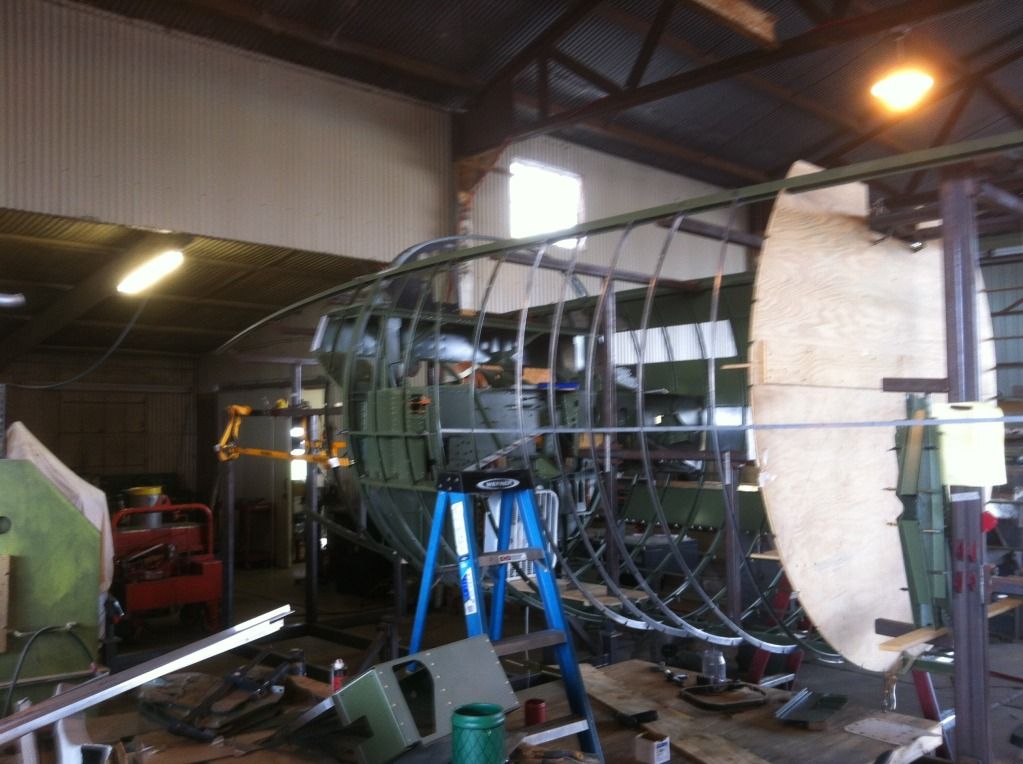
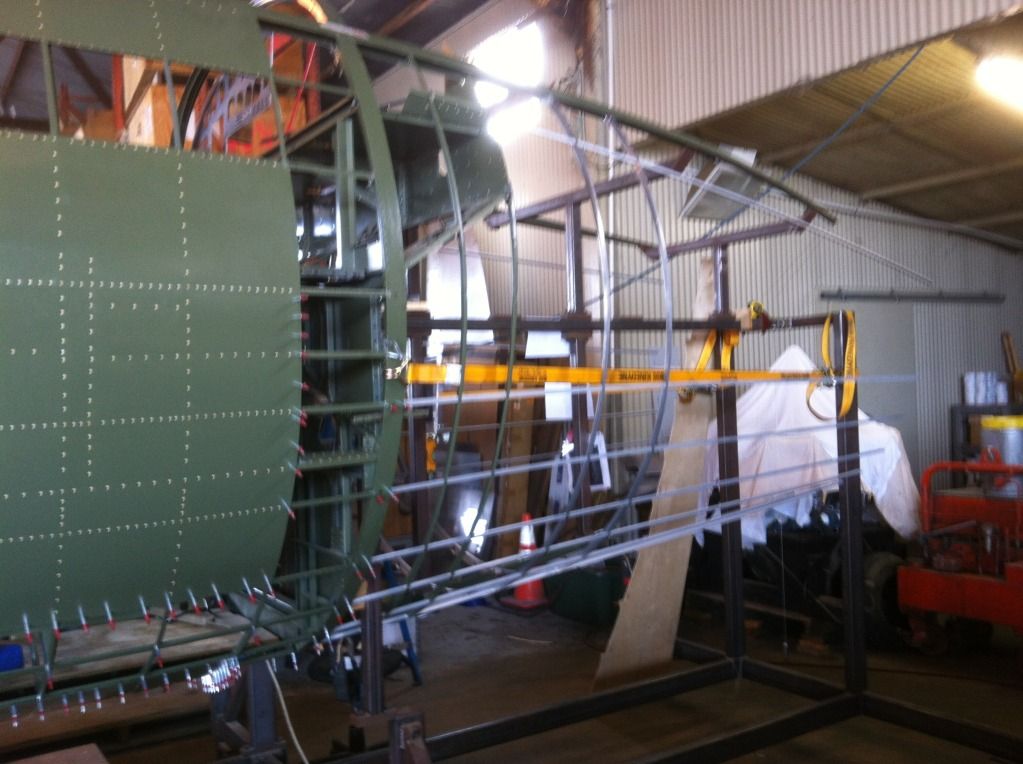
Work continued on bulkhead 3 and the flight deck, while we started work on the Circumfrential Stiffeners (ribs), Longitudinal Stiffeners (stringers), and skin. The original skin was pop rivetted together to verify the new construction.

At this point in the construction, I went off to work on "the movie Memphis Belle", so while work continued, I don't have pictures.
Chuck
Re: Labrador B-17G 44-83790 restoration
Posted: Sun Dec 02, 2012 6:29 am
by Chuck Giese
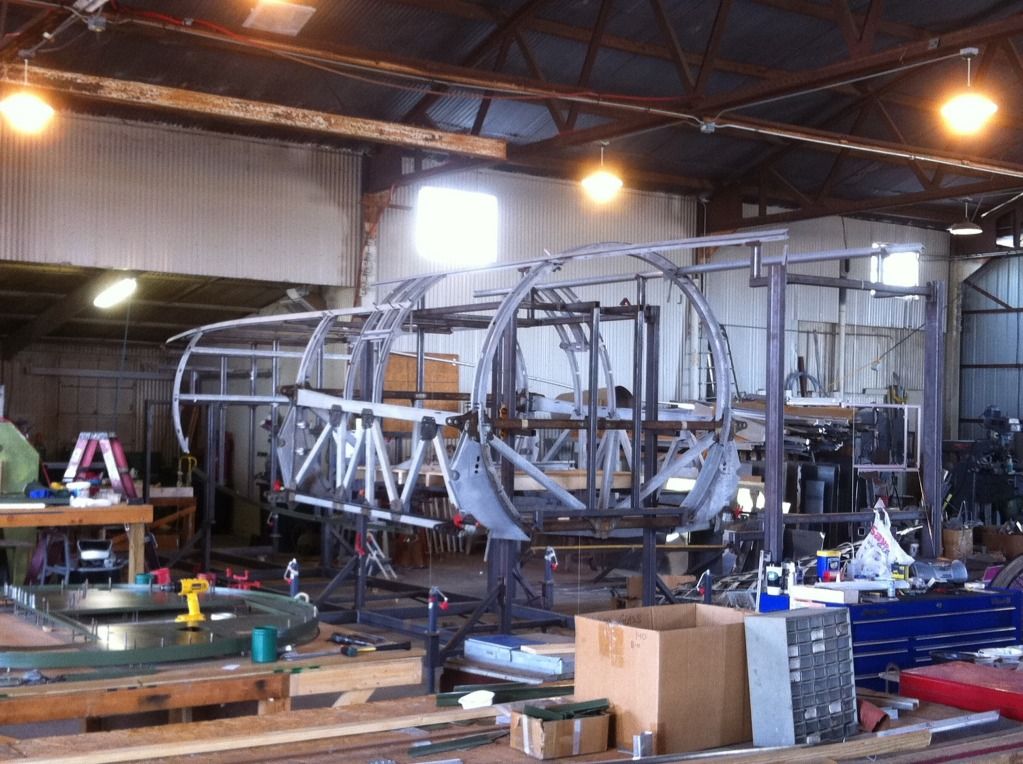
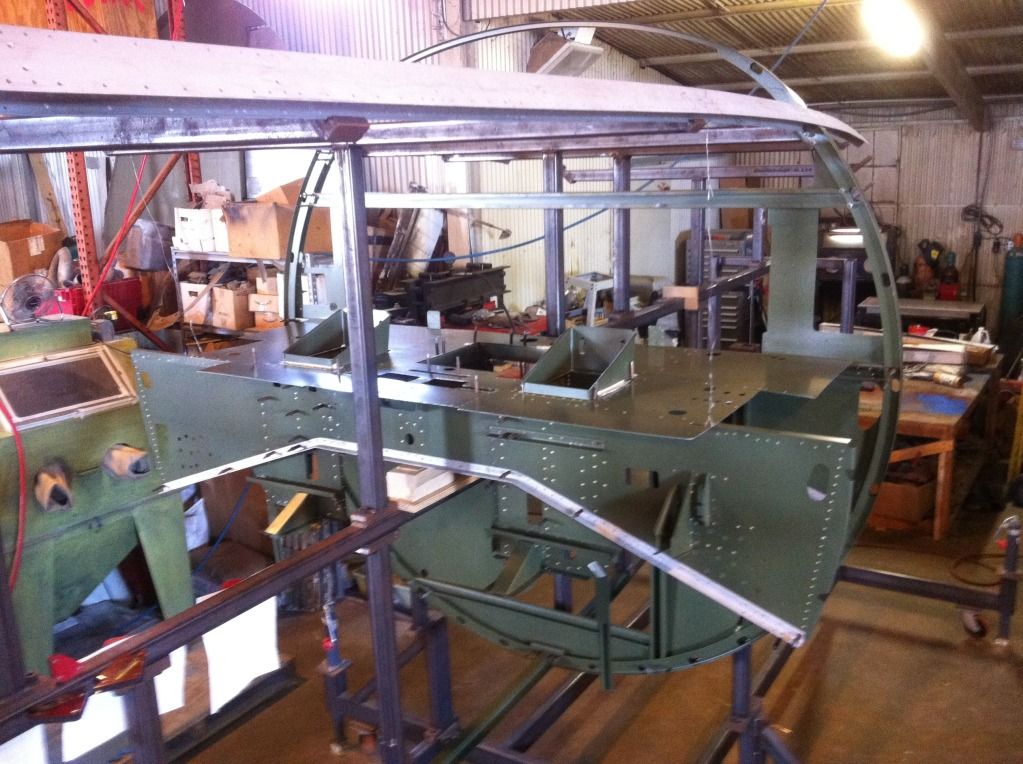
We continued working our way towards the nose. We received Bulkheads 1 & 2 from Hang the Expense, which allowed us to start rivetting the nose together.
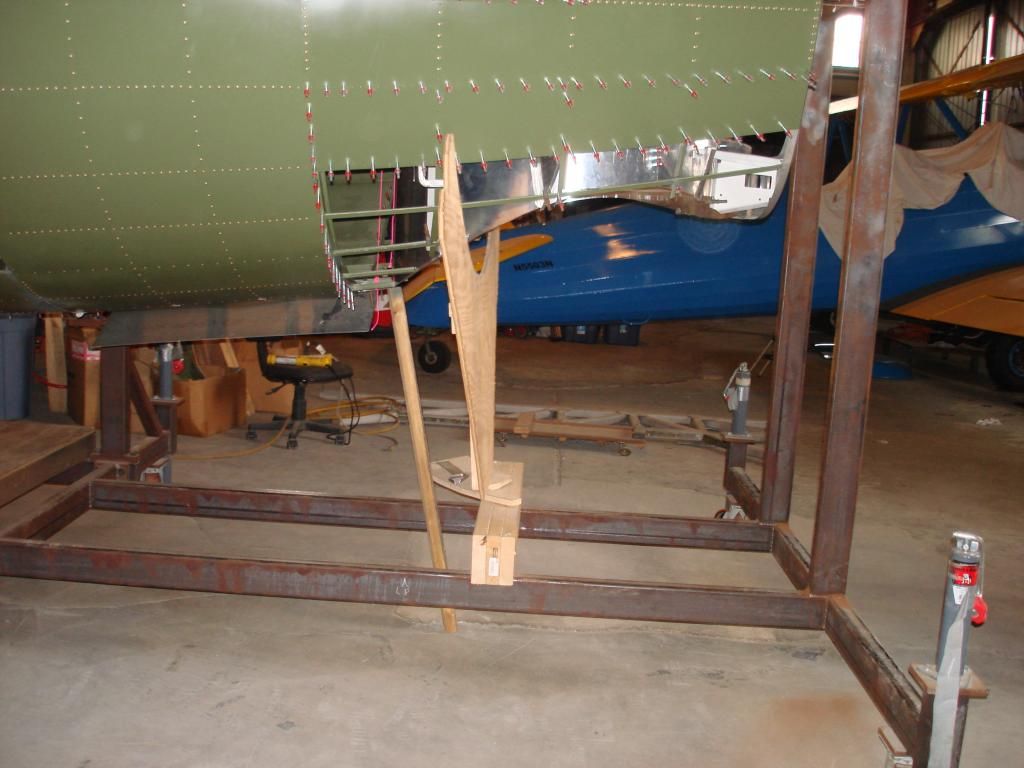
Bulkhead 1 with assembly form. The form is stout enough that we can use it to support the finished fuselage nose when it's time to remove the assembly jog.
Bulkhead 2 with assembly form. This also comes out in peices, and since it's wood, we can cut access holes in it easily as required.
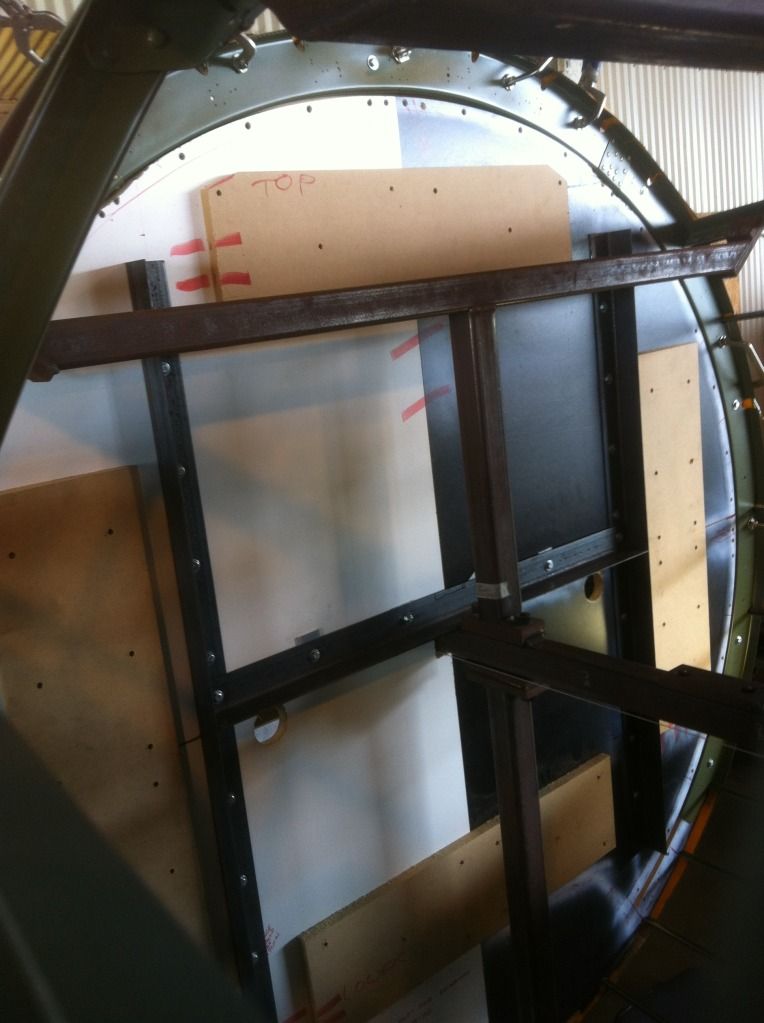
View of Bulkhead 3 from the nose.
Chuck
Re: Labrador B-17G 44-83790 restoration
Posted: Sun Dec 02, 2012 6:43 am
by Chuck Giese
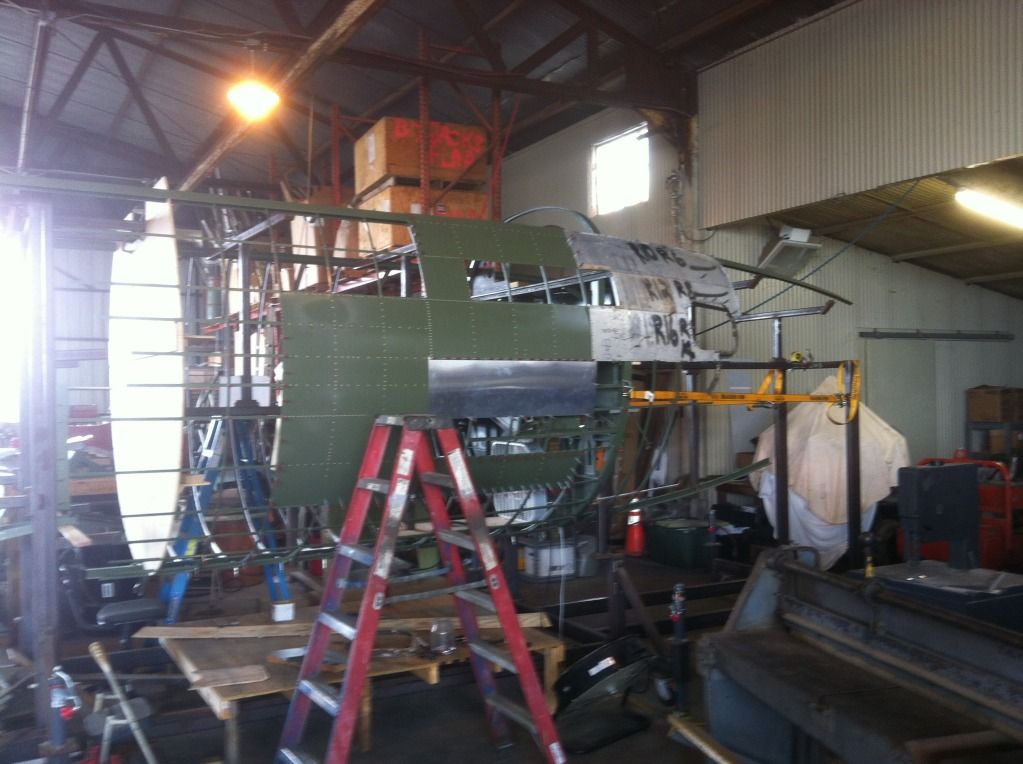
We've now caught up to the current state of the restoration. A couple more pictures to add to those that started this thread:
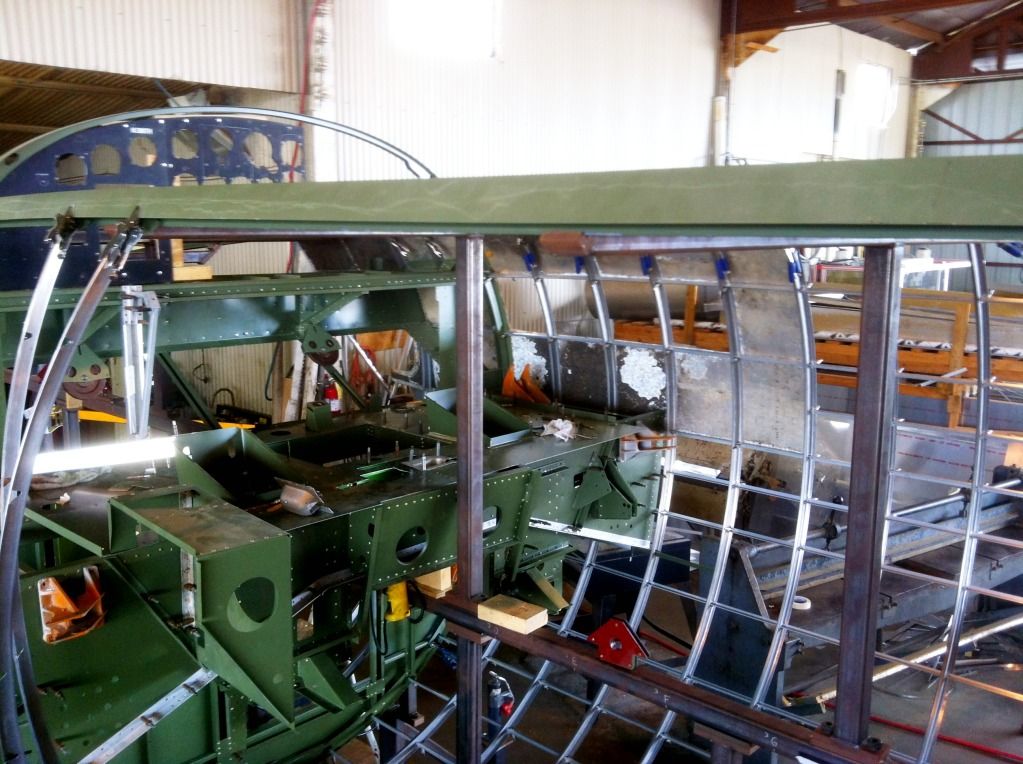
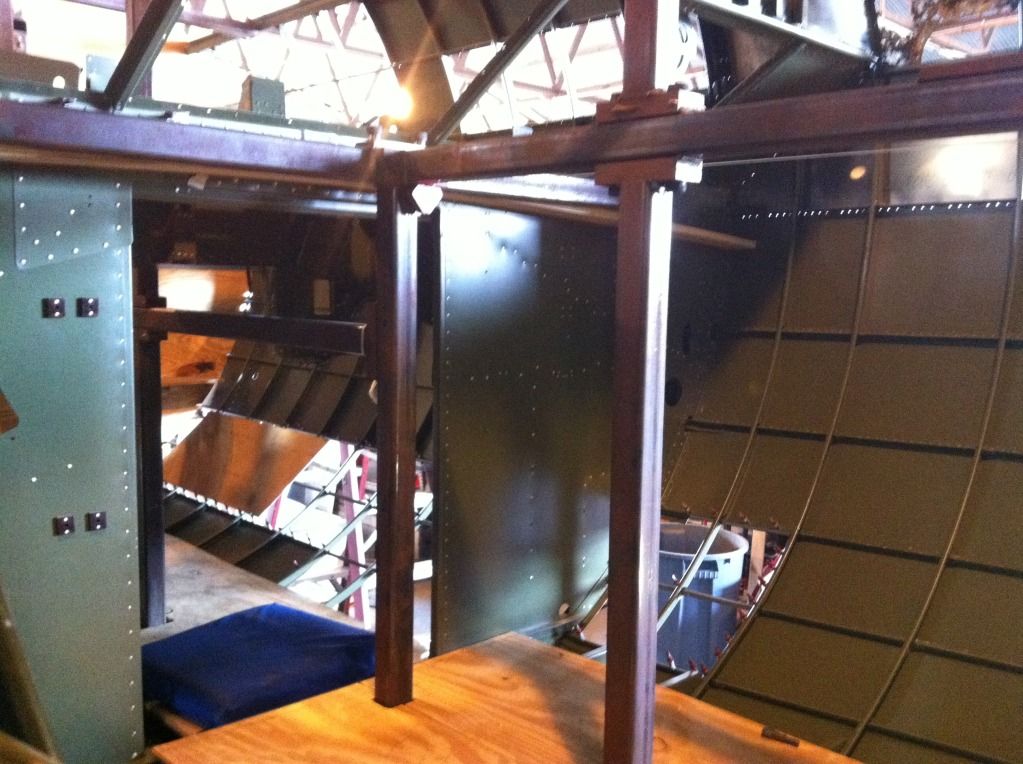
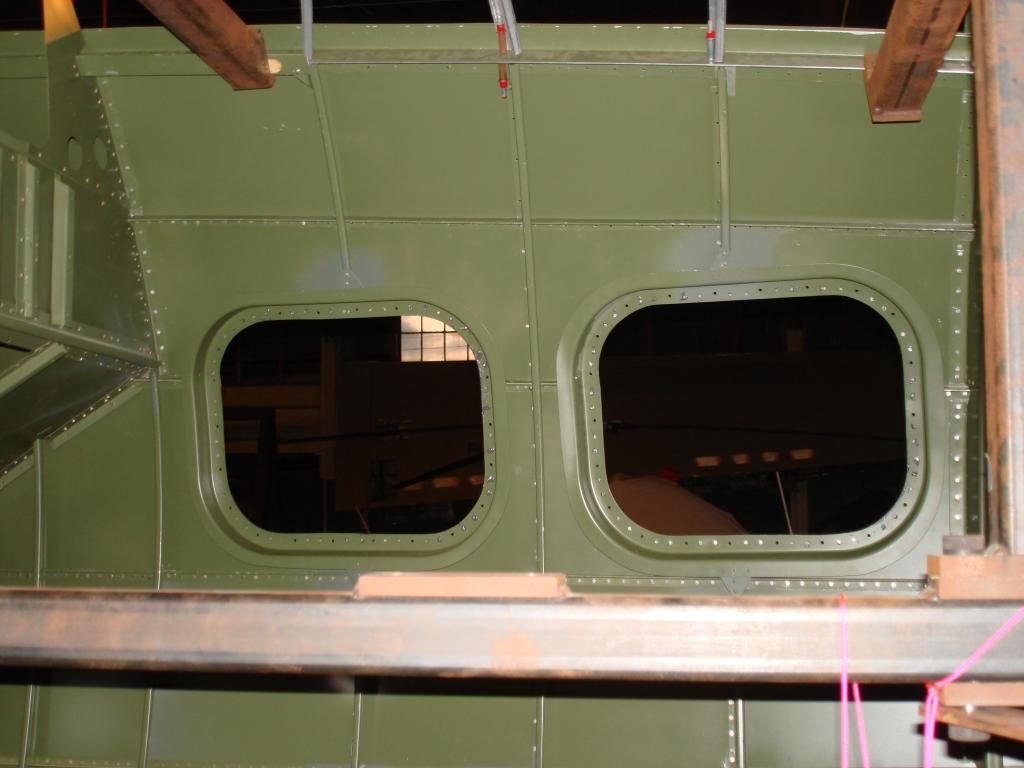
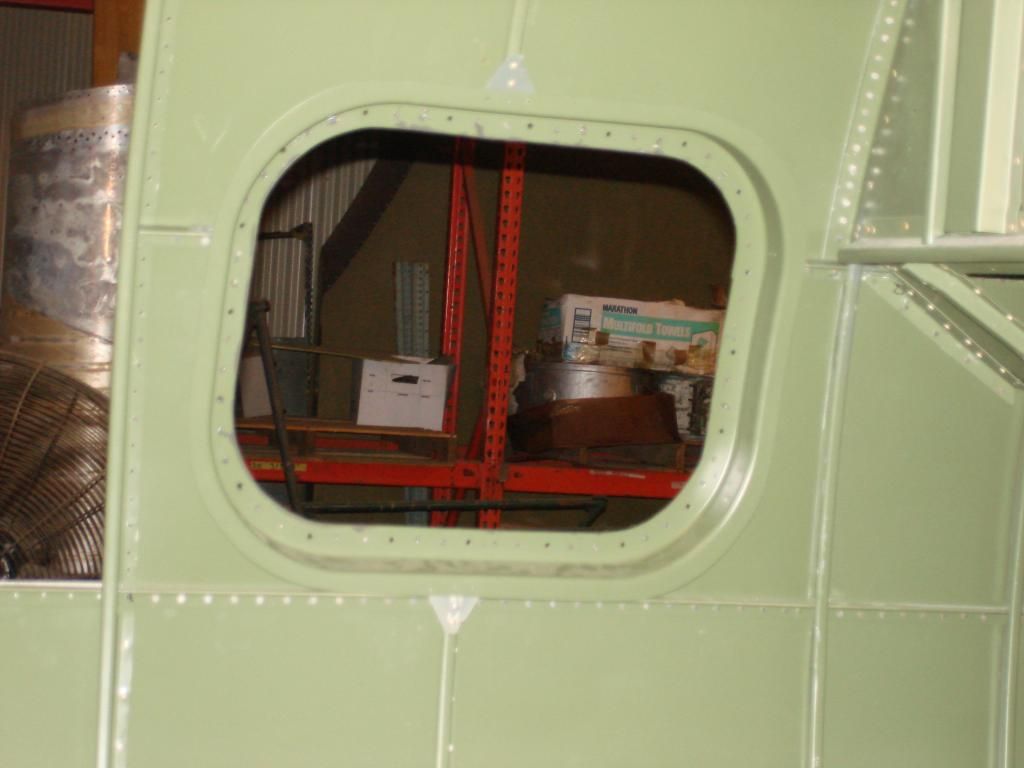
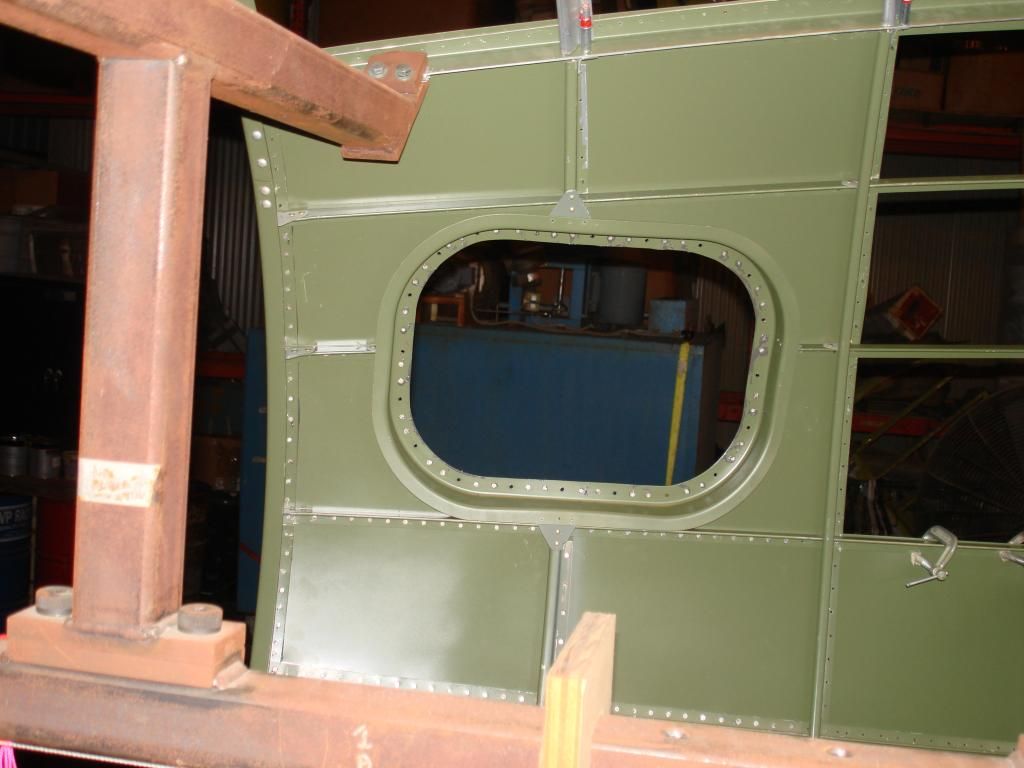
The forward crew entry door will go here.
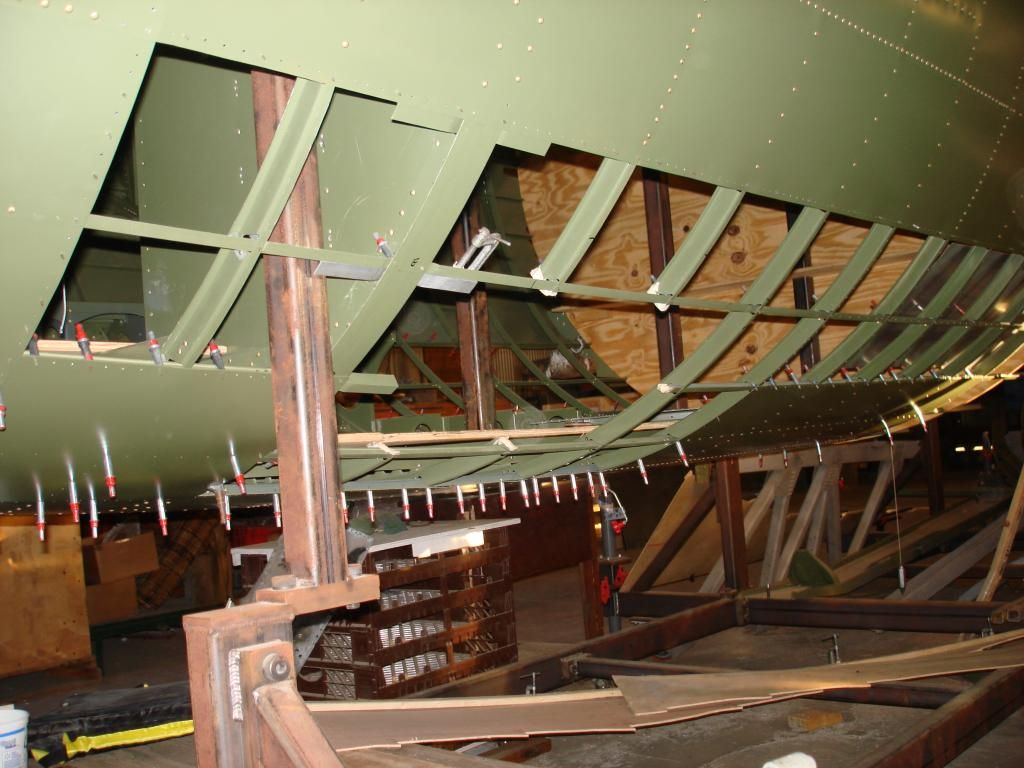
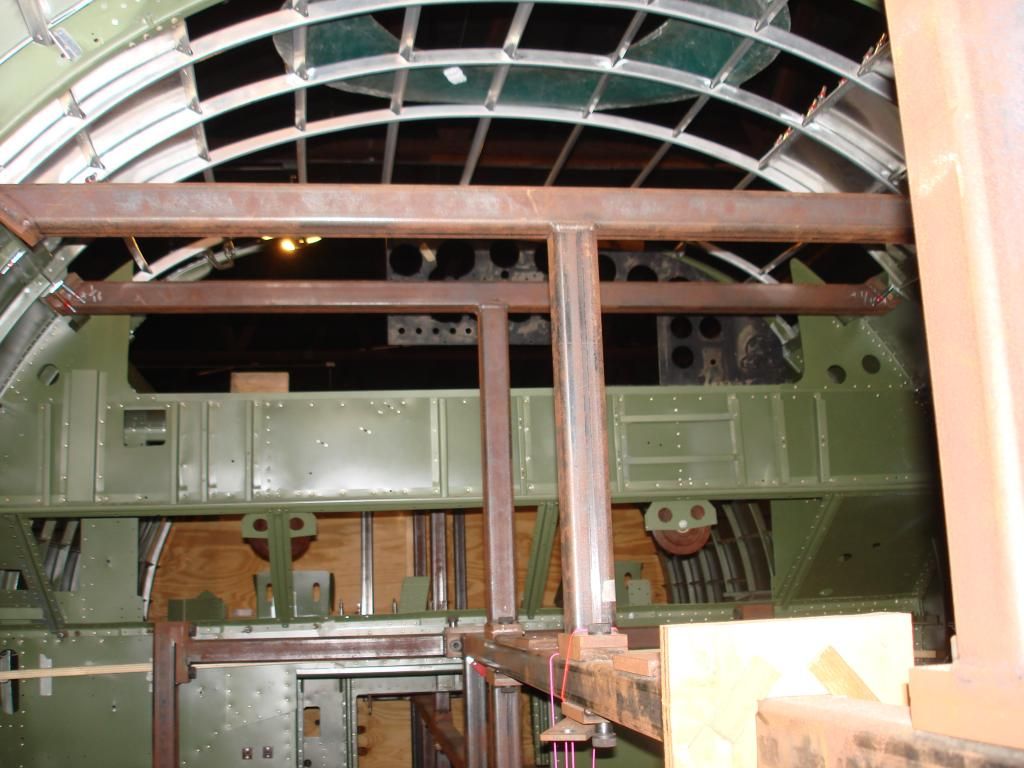
Looking in the door opening, you can see the equipment shelves in the bilge, to the left is Bulkhead 3 and the entry to the nose section, while above is the underside of the flight deck.
Chuck
Re: Labrador B-17G 44-83790 restoration
Posted: Sun Dec 02, 2012 5:27 pm
by Lucky 13
Chuck thanks for the up date on the plane and if there is something that I need to add to to the jig to make it better please let me know because I am building two right now. I will be starting a new post on them soon.
Re: Labrador B-17G 44-83790 restoration
Posted: Tue Dec 04, 2012 12:05 pm
by KnockoutDropper
Awesome work and awesome thread. Keep it up!
Re: Labrador B-17G 44-83790 restoration
Posted: Tue Dec 04, 2012 12:39 pm
by cvairwerks
Looking good on the progress.
Lucky: When you start the thread on the new jigs, would you be willing to take the time to do a basic walk-thru on how you establish the station, water line and butt line locations? I've got to build some jigs for a couple of projects and no longer have access to the tooling guys that I've known for years. I've got a couple of McAir tooling manuals for some reference, but they are geared to production jigs and optical alignment rather than one-off fixtures. I've got some thoughts on how to do it, but would rather be tutored before making chips and costly mistakes.
Re: Labrador B-17G 44-83790 restoration
Posted: Sat Jan 26, 2013 1:29 pm
by Chuck Giese
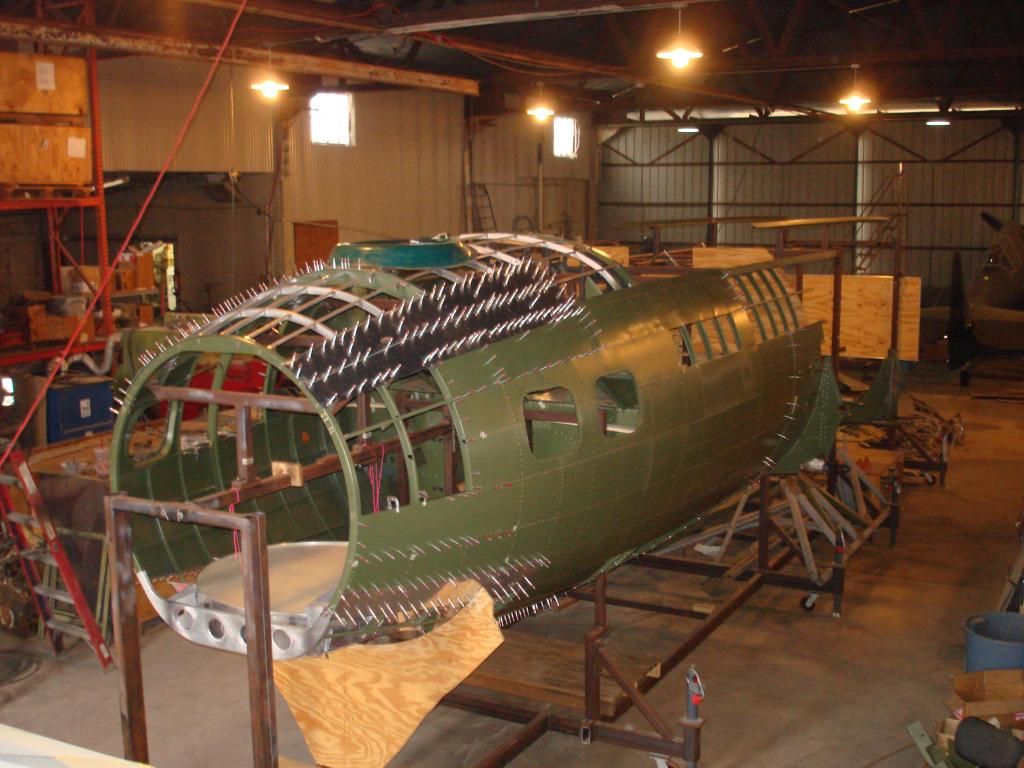
Now that the dust has settled after the holidays, here's the latest update:
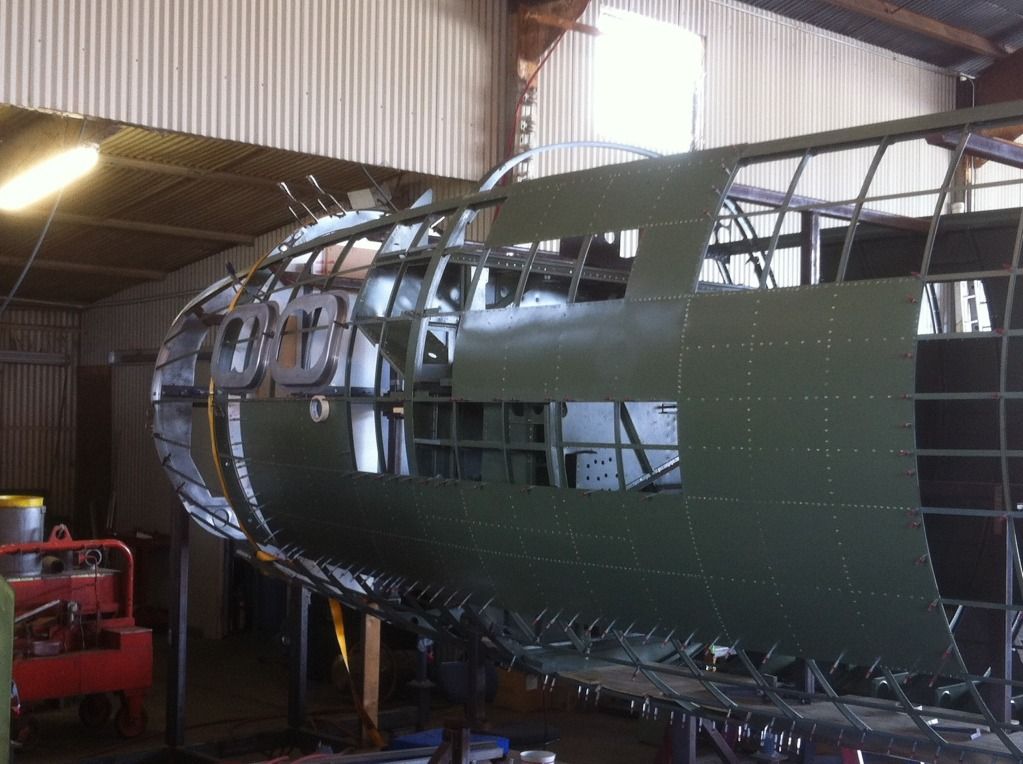
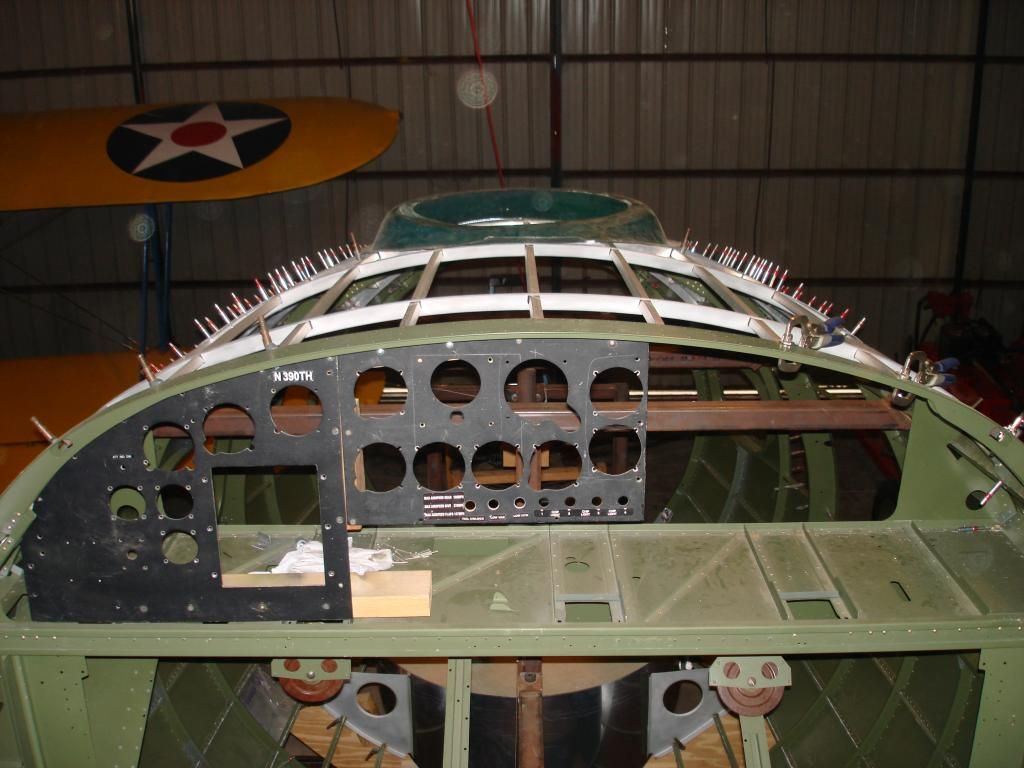
The windows have been rivetted in, and the structure for the top of the nose is in place.
(The astrodome fairing is fiberglass, and was borrowed by another restoration, who made aluminum copies. We'll be using one of those when it's time to rivet it in.)
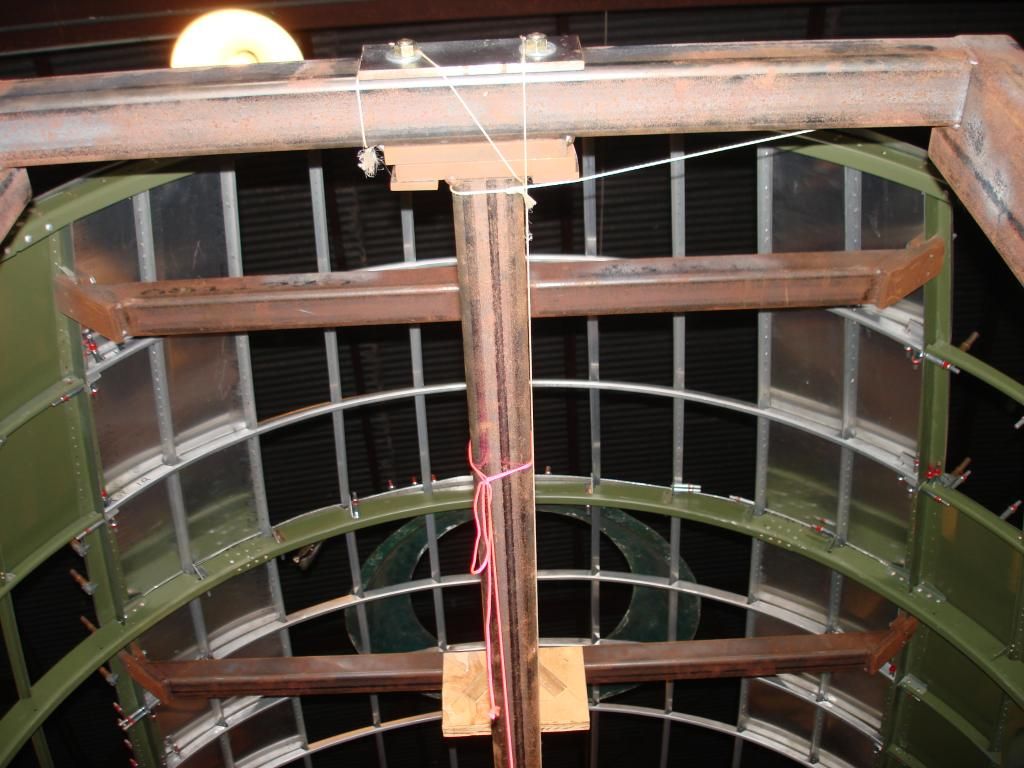
The view through the "windscreen" (with an old instrument panel we had in storage).
You can see the contour of the chin turret well. I need to get back on that part of the project.
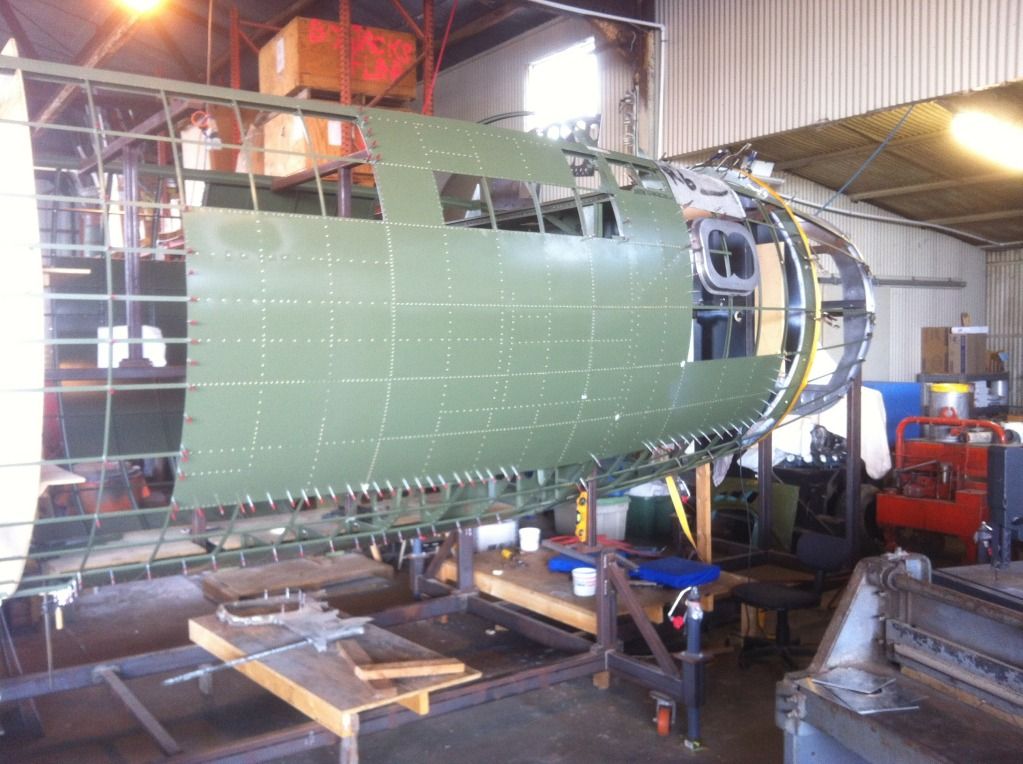
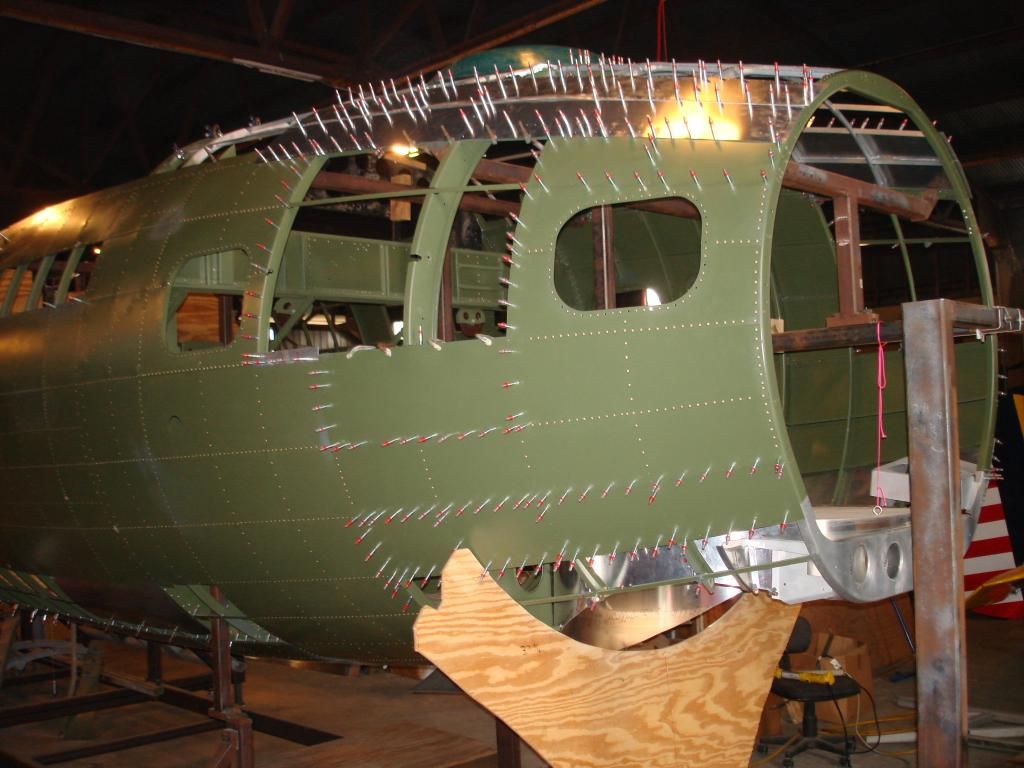
Misc interior nose shots:
As you can see, we decided that the easiest way to keep the nose contour intact was to put all of the stringers and stiffeners in first, and then cut them out where we need holes for windows and the astrodome.
We're looking for the structure that goes under the astrodome fairing. Anybody have it tucked away somewhere? We would like to buy it or make molds from it.
Chuck
Re: Labrador B-17G 44-83790 restoration
Posted: Sun Jan 27, 2013 3:14 am
by Dave
Chuck,
I think i have the internal astrodome section. I will look tonight for you
Dave
Re: Labrador B-17G 44-83790 restoration
Posted: Mon Jan 28, 2013 11:36 pm
by Dave
is this any good
Re: Labrador B-17G 44-83790 restoration
Posted: Tue Jan 29, 2013 6:31 am
by Lucky 13
Dave would you have another one, would like to have one for lucky 13.
Re: Labrador B-17G 44-83790 restoration
Posted: Wed Jan 30, 2013 9:27 am
by Chuck Giese
Dave wrote:is this any good
Yes, that's exactly what we're looking for, the deep "V" hat channel. It looks like the piece that it's attached to has the center part cut away. What's missing would have had a "Z" bend that reinforces the inside lip of the astrodome fairing.